NUT Client - Synology NAS
NUT UPS setup
Synology NAS setup
Table of contents
Source
Zanshin Dojo’s Synology + Proxmox + NUT UPS is very helpful and is one of the few clear articles I found about how to set up a Synology NAS as a client only, and not as a NUT server.
NUT UPS setup
Synology NAS configuration pre-work on NUT server
Synology’s DSM OS has a built-in NUT client monitor that doesn’t require any SSH file editing. However, the NUT server has to be set up properly because Synology’s client is hardcoded to use specific NUT UPS and user names.
You have to name things as below or the Synology will refuse to connect. They can’t be called anything else.
Ensure your NUT Server has the proper UPS and user names
- A UPS name in the
ups.conffile on the NUT server must be calledups. - A user name in the
upsd.usersfile on the NUT server must be calledadminwith passwordsecret.
The instructions in this document already name things so that the NUT server will work with the Synology NUT client.
Synology NAS setup
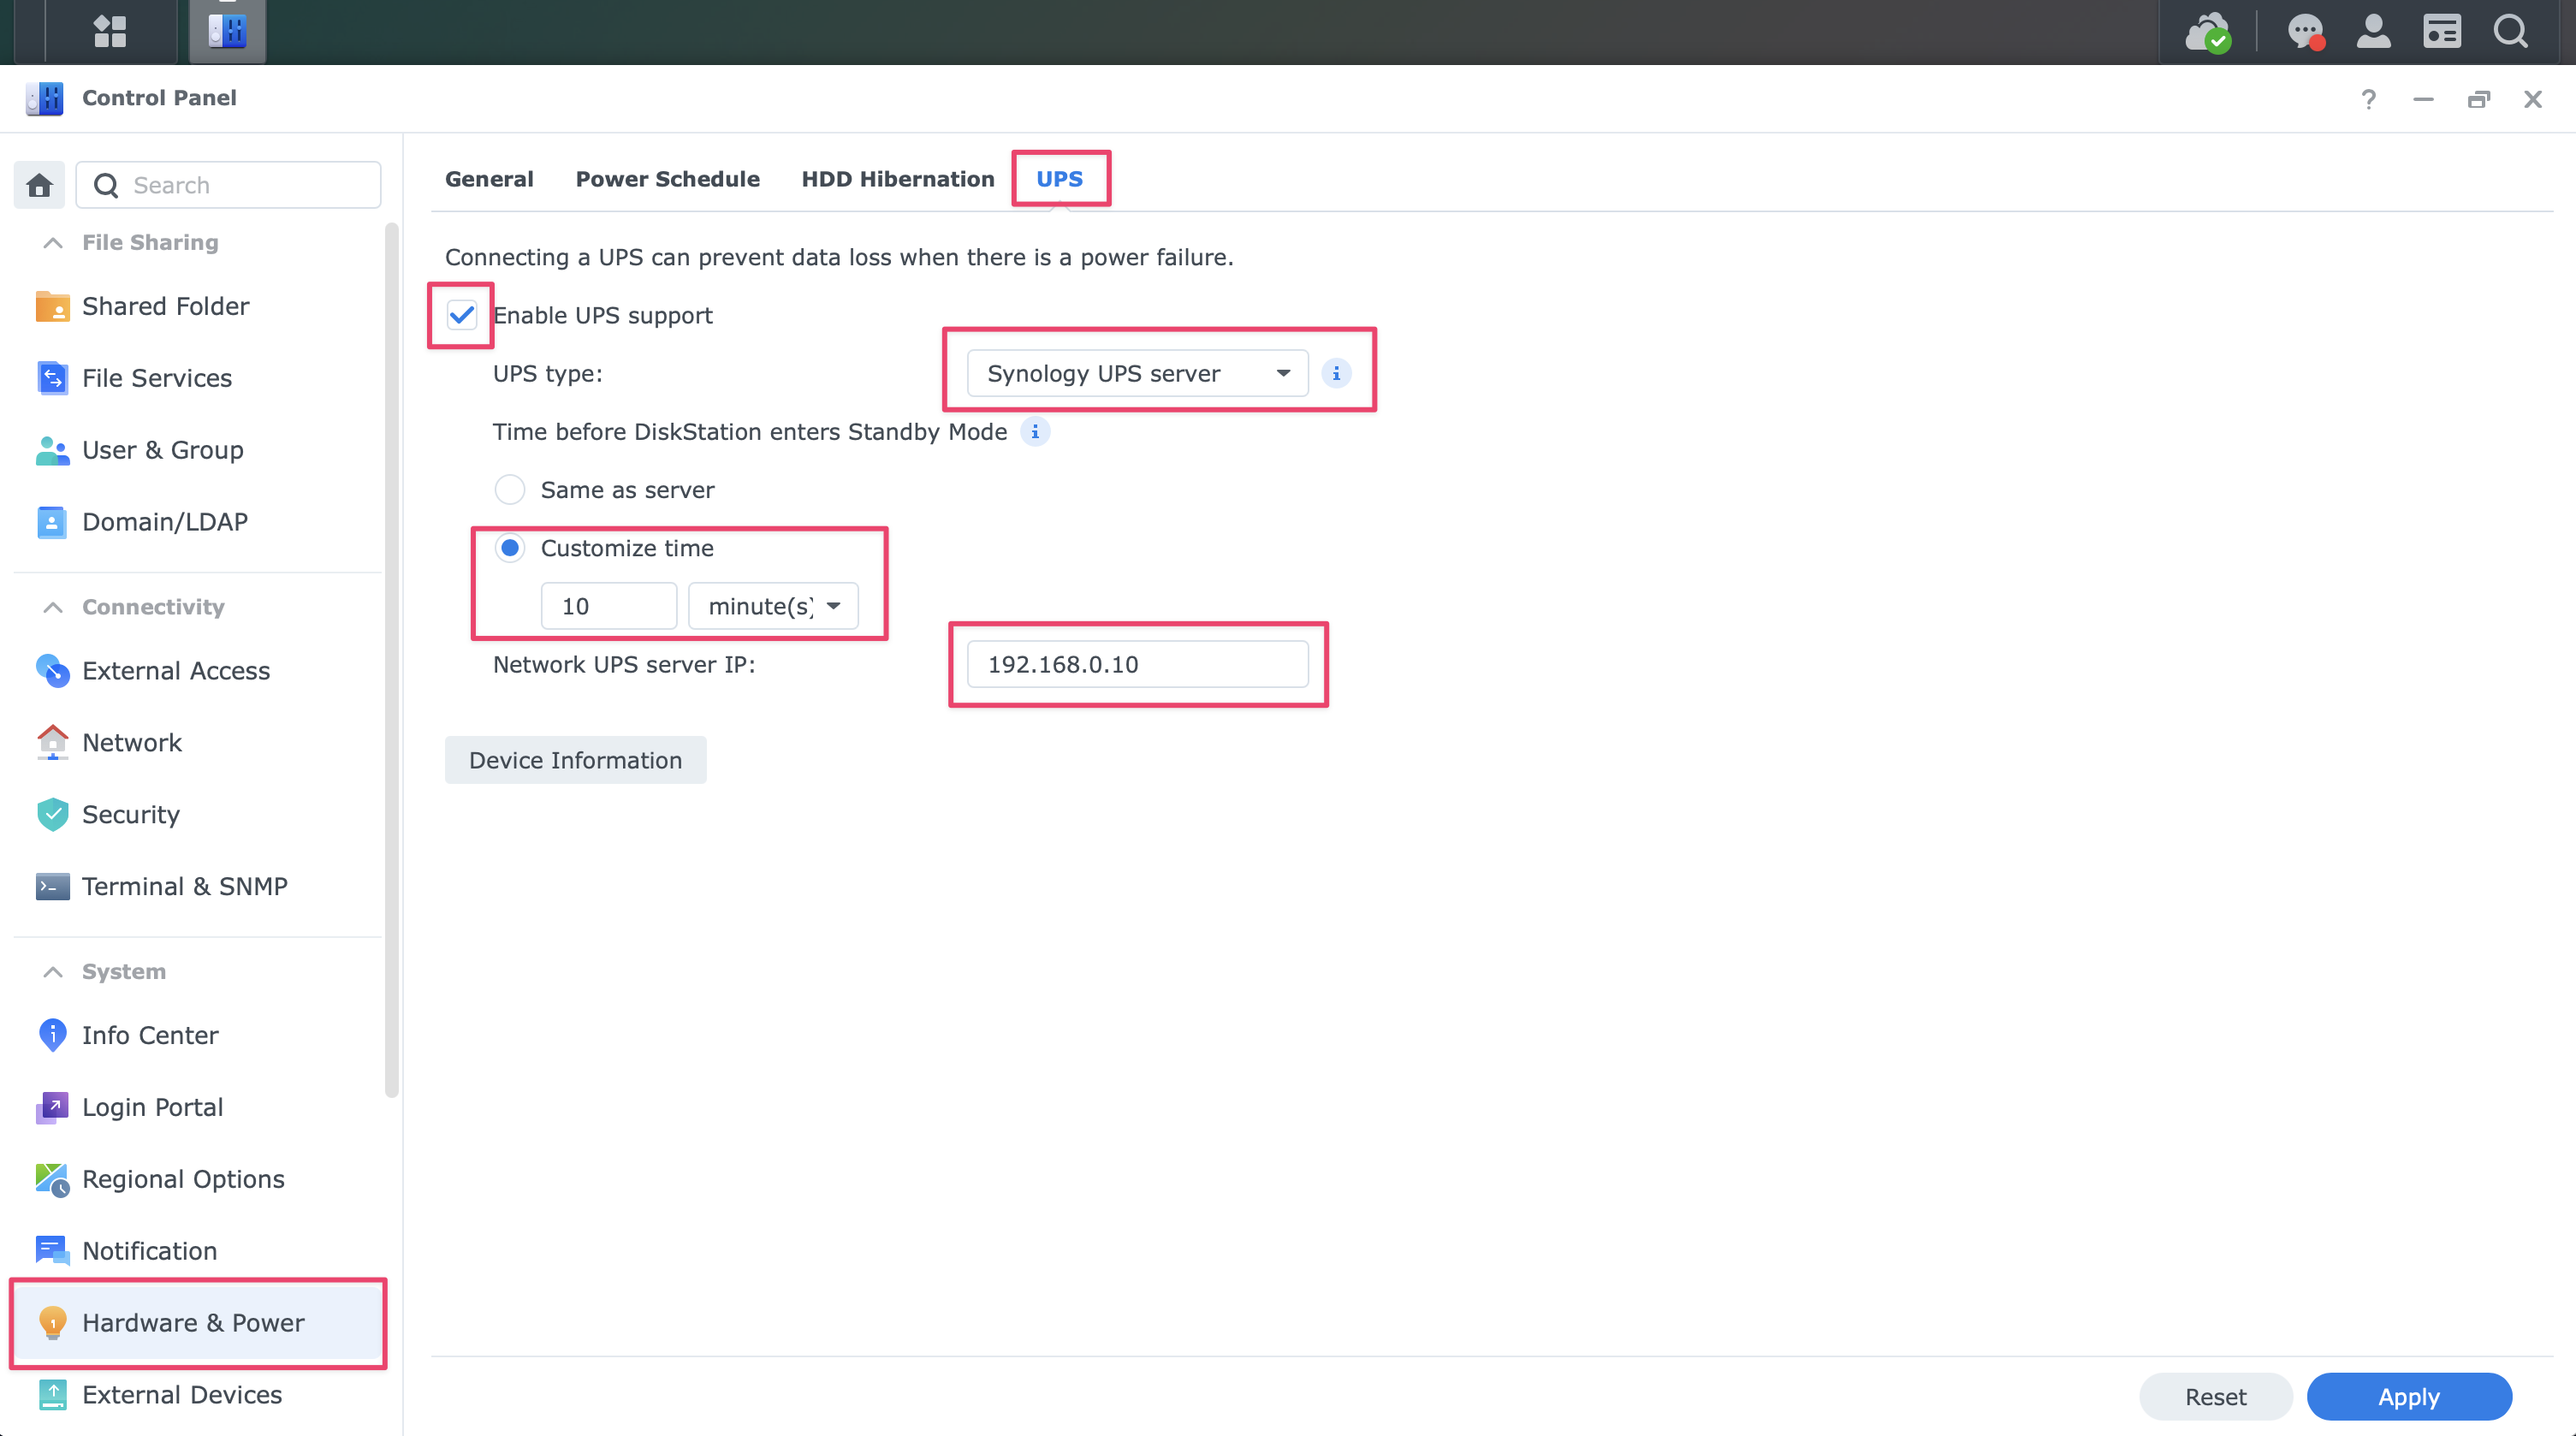
Set up UPS client in the Synology DSM UI
Enter your NUT server’s IP address into the Synology DSM UPS screen in Control Panel
Click:
Hardware & Power → UPS
Fill the screen out like below:
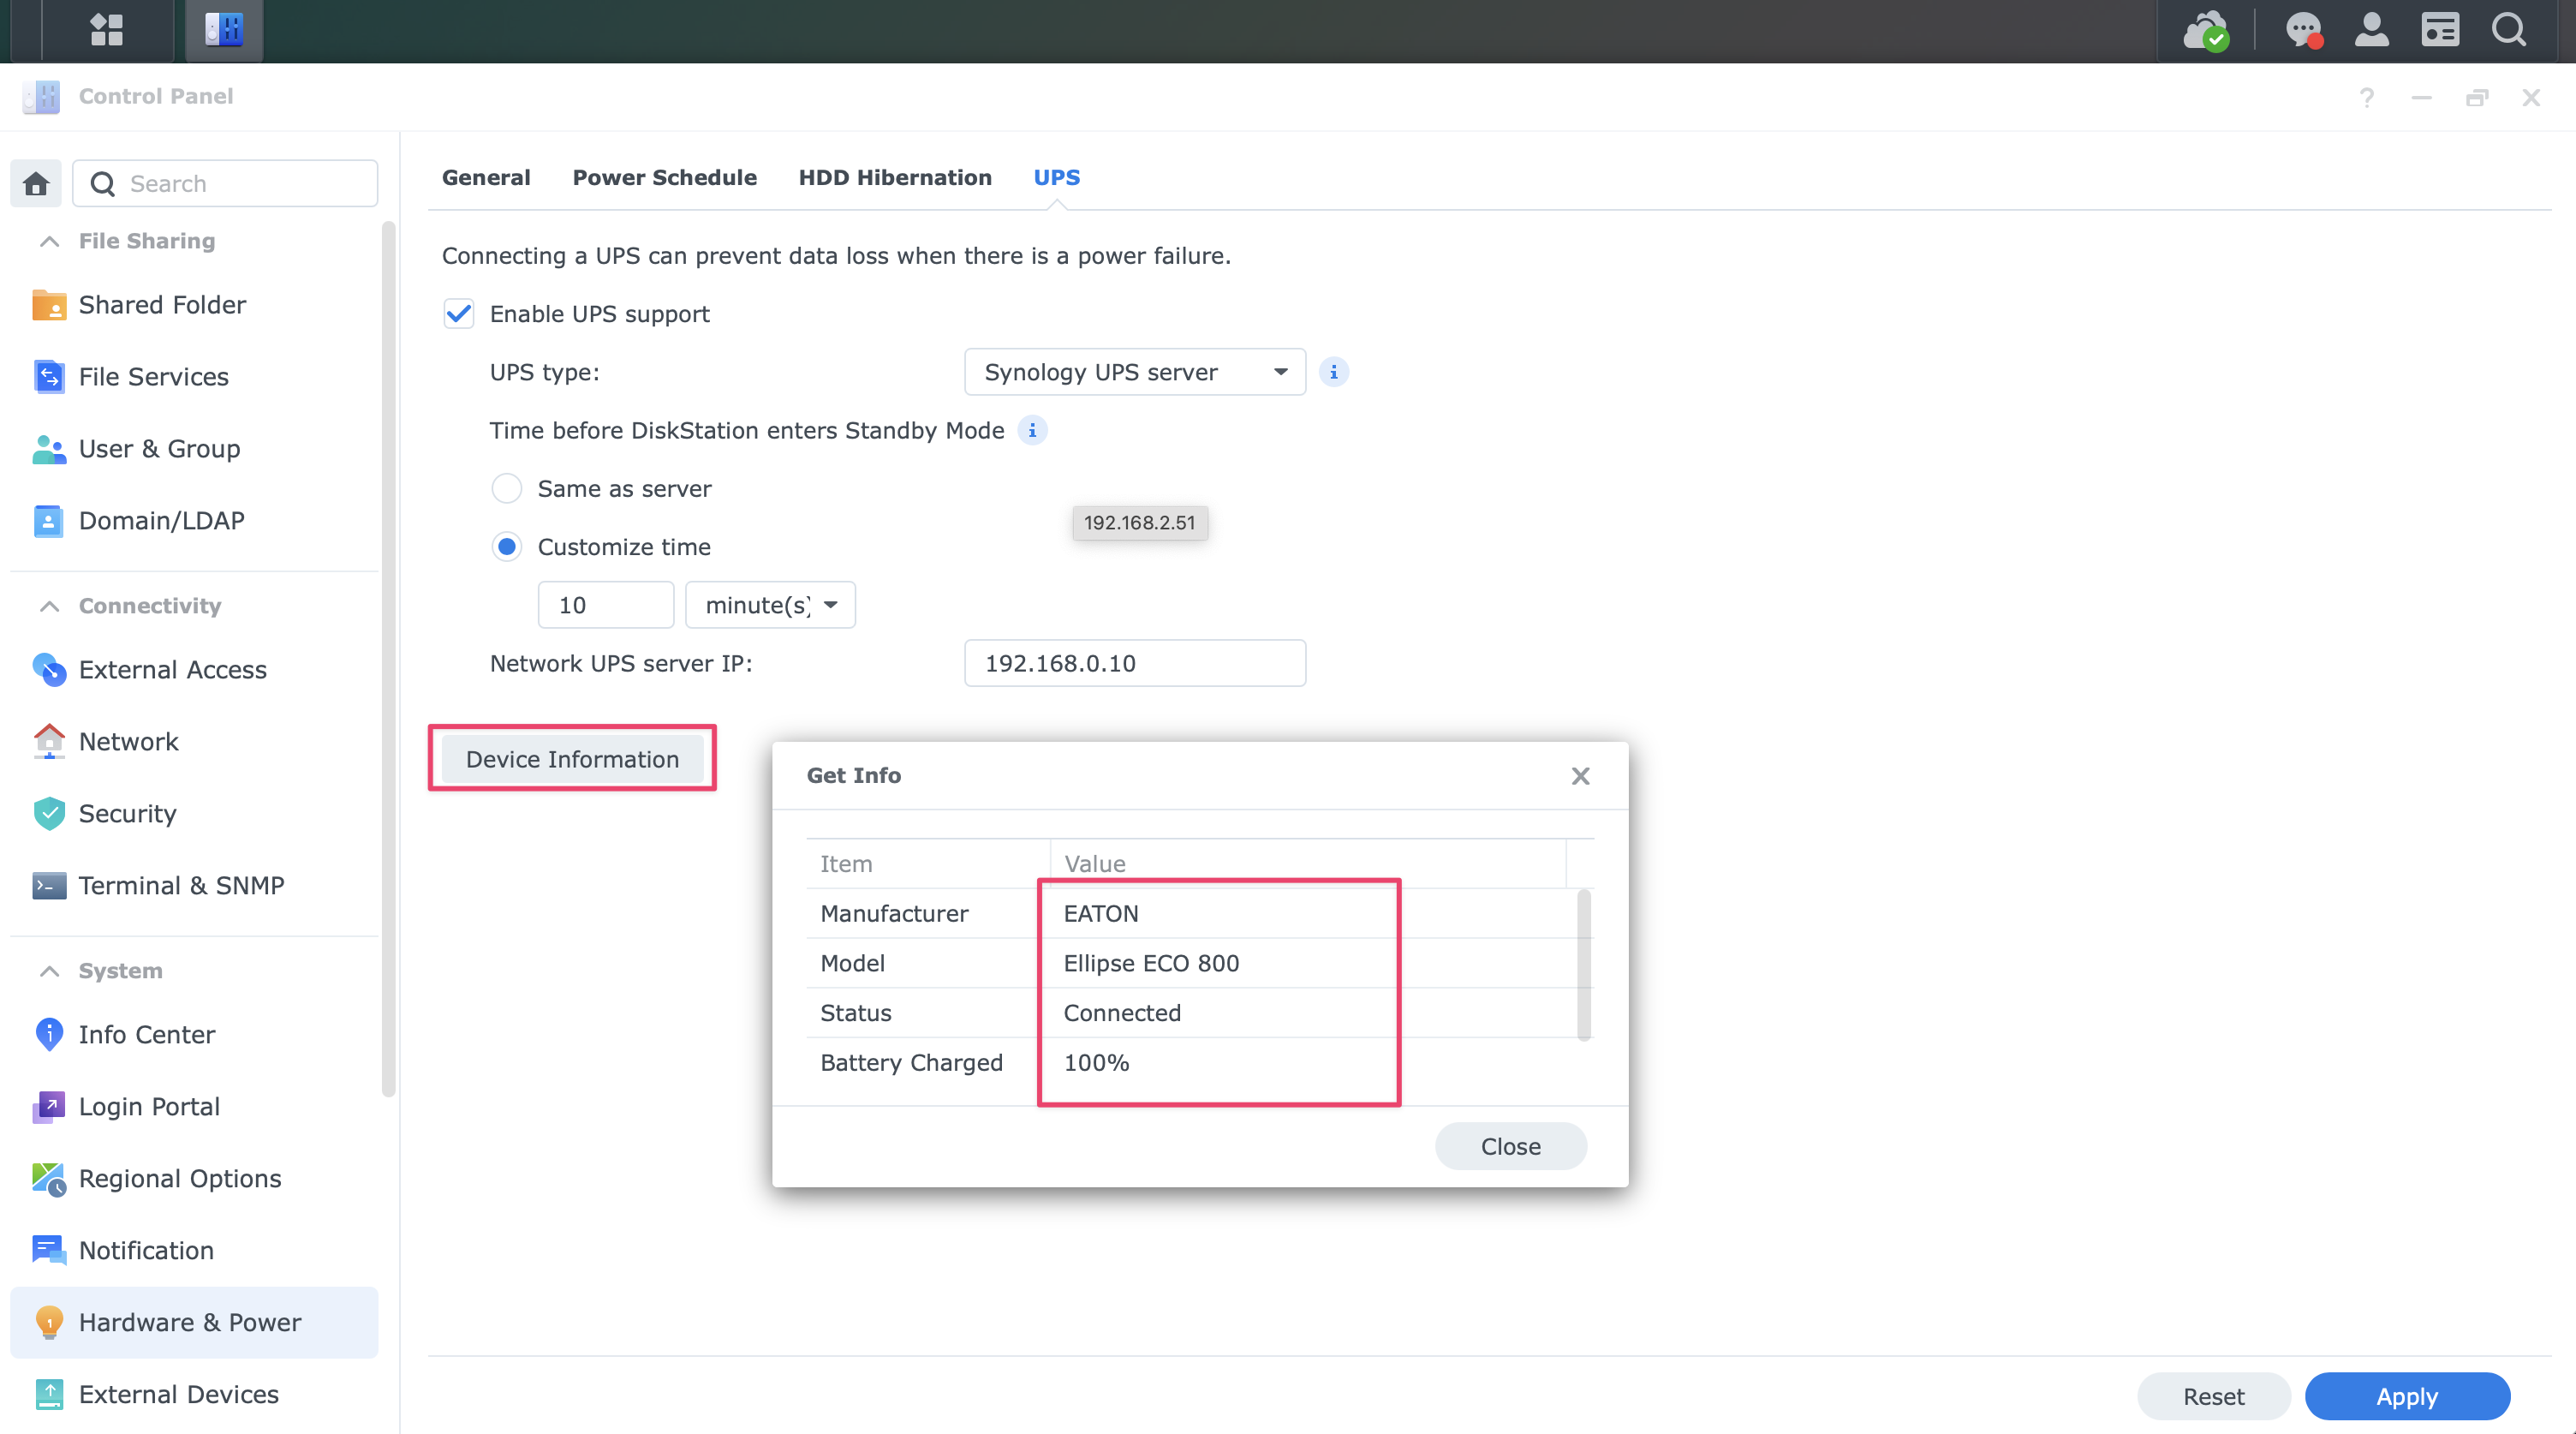
Check the NAS connection to your UPS by clicking Device Information and reviewing the table in the popup: