VM Setup: Proxmox GPU (PCI) Passthrough
Proxmox VM setup
Table of contents
- Background and Warnings
- Source Information
- In Proxmox GUI, add GPU to VM PCI devices
- Turn off VM Display
- Verify iGPU hardware passthough is working in the Ubuntu VM
Background and Warnings
-
First, only perform these steps after you have confirmed that Proxmox GPU passthrough is working on your Proxmox host server.
Detailed instructions are in this doc at Proxmox GPU Passthrough: Host Setup.
-
Second, only perform these steps after you have set up the Linux VM.
For detailed instructions, see Create Ubuntu VM: Cloud-Init Ubuntu Install in this doc.
-
Third, these instuctions only work for Intel integrated GPUs, also known as iGPUs.
These VM steps will not work as written below with Intel discrete, AMD, or Nvidia GPUs.
-
Fourth, these instructions do not work with Proxmox LXCs, only VMs.
These VM steps are only for passthrough to a VM, not an LXC.
Anand has detailed instructions for LXC passthrough in his excellent article and video, UDMS Part 11: GPU passthrough on Proxmox LXC for Superior HW Transcoding!
-
Finally, these instructions are for Linux OS VMs, specifically Ubuntu, and will not work on a Windows OS VM.
For enabling passthrough in a Windows VM, see Derek Seaman’s great tutorial, Proxmox VE 8.3: Windows 11 vGPU (VT-d) Passthrough with Intel Alder Lake
Source Information
Sources:
- Craft Computing’s Proxmox 8.0 - PCIe Passthrough Tutorial video is the best explainer I have seen of this process.
- Proxmox PCI(e) Passthrough documentation
In Proxmox GUI, add GPU to VM PCI devices
These steps can only be done after you have created a VM and only affect that VM.
Do
-
In Proxmox GUI, open the VM’s “PCI Device” settings:
pve→[VM#]→Hardware→Add→PCI Device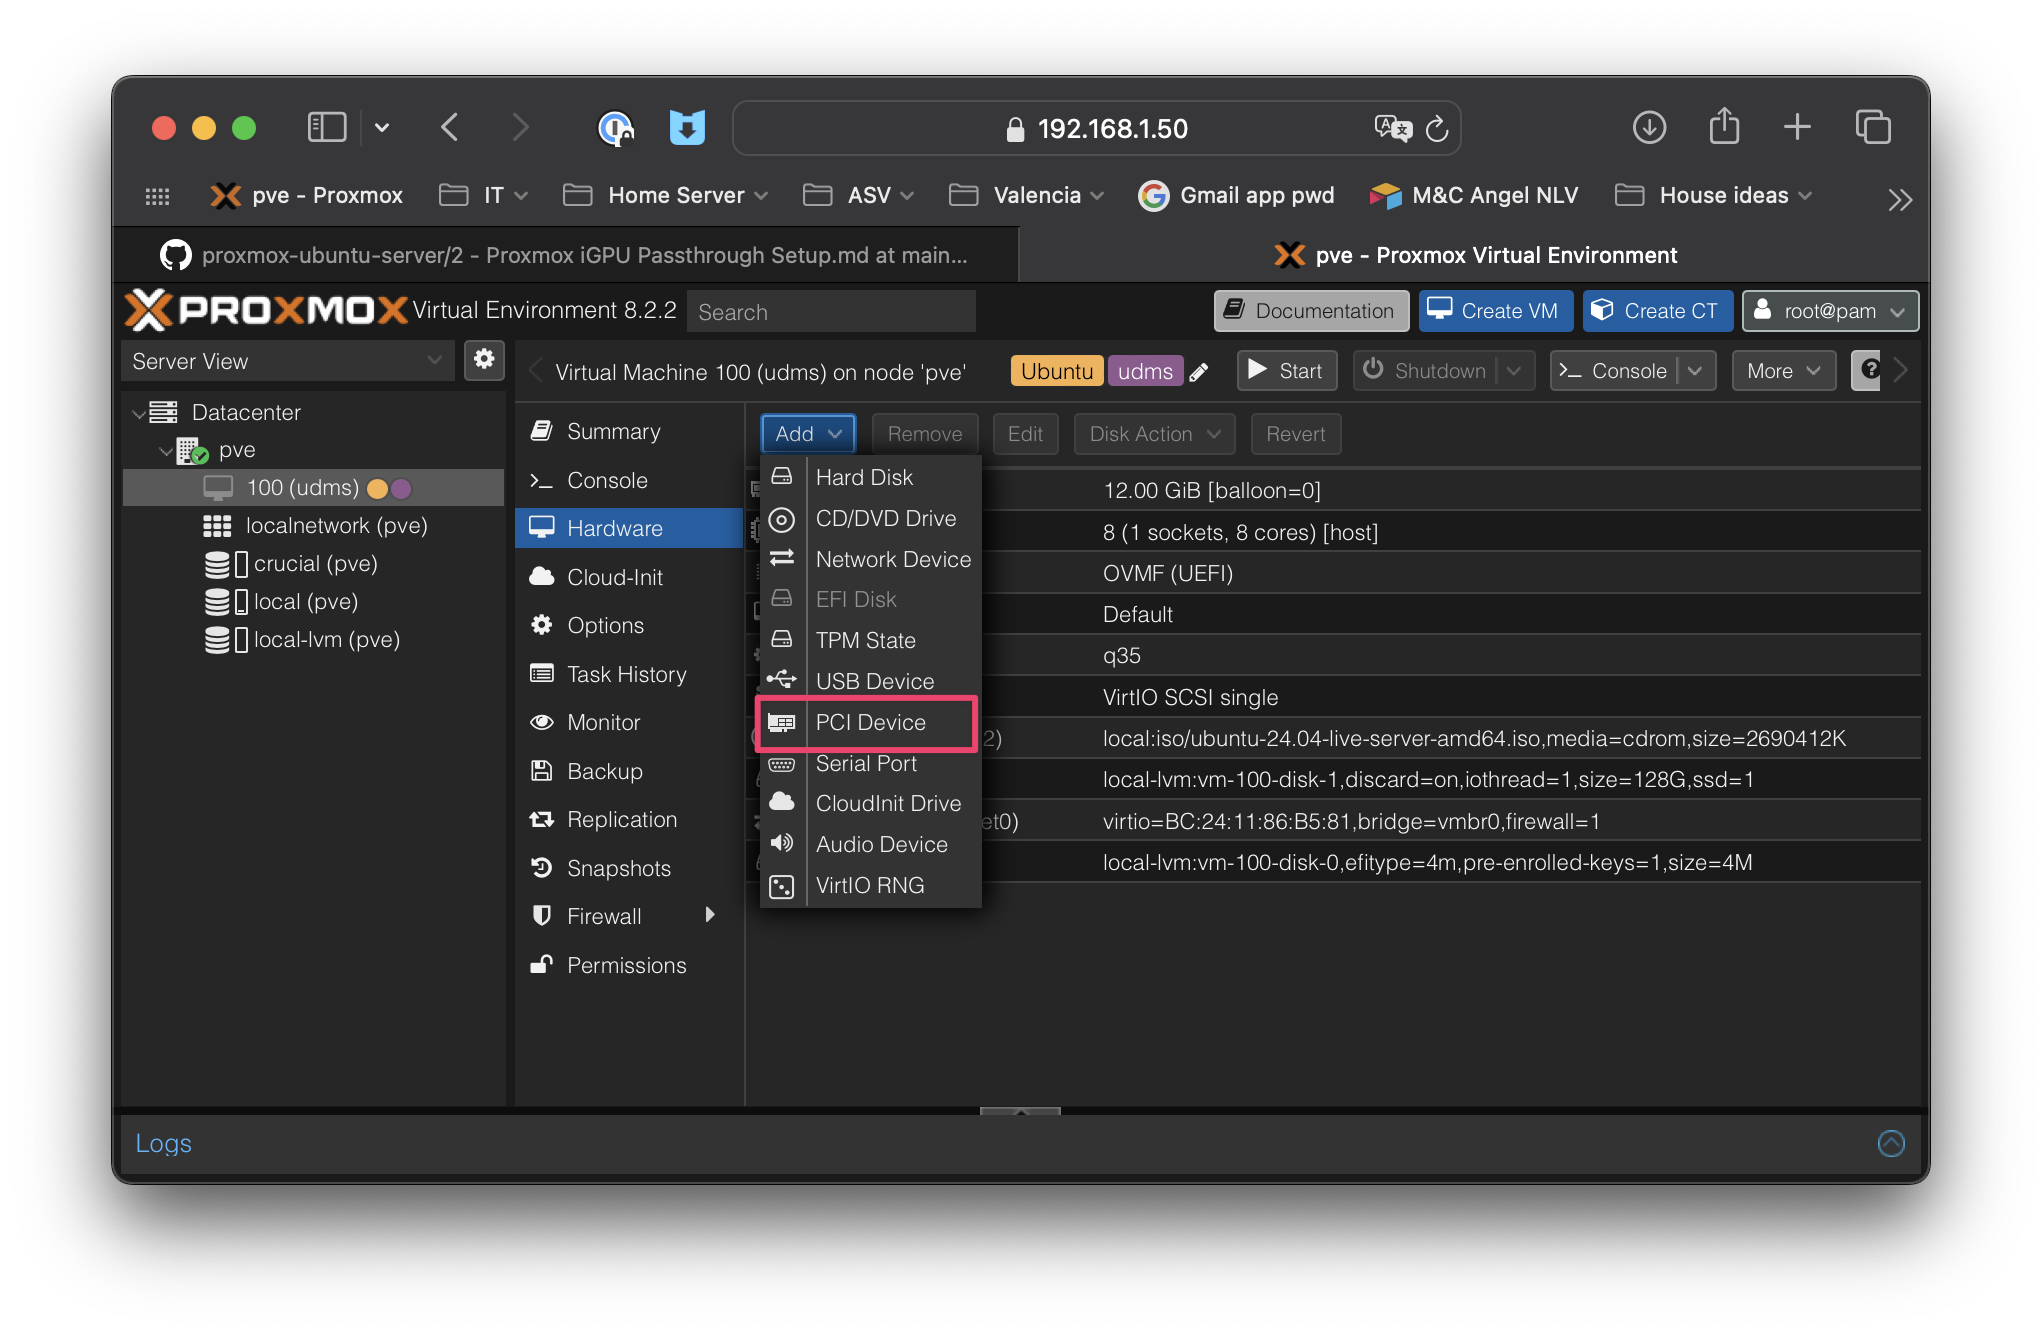
-
In popup, select the following:
 Raw Device: YES
 Device: Select your GPU
Then click the following:
 All Functions: YES
 ROM-Bar: YES
 Primary GPU: YES
 PCI-Express: YES (requires 'machine: q35' in VM config file)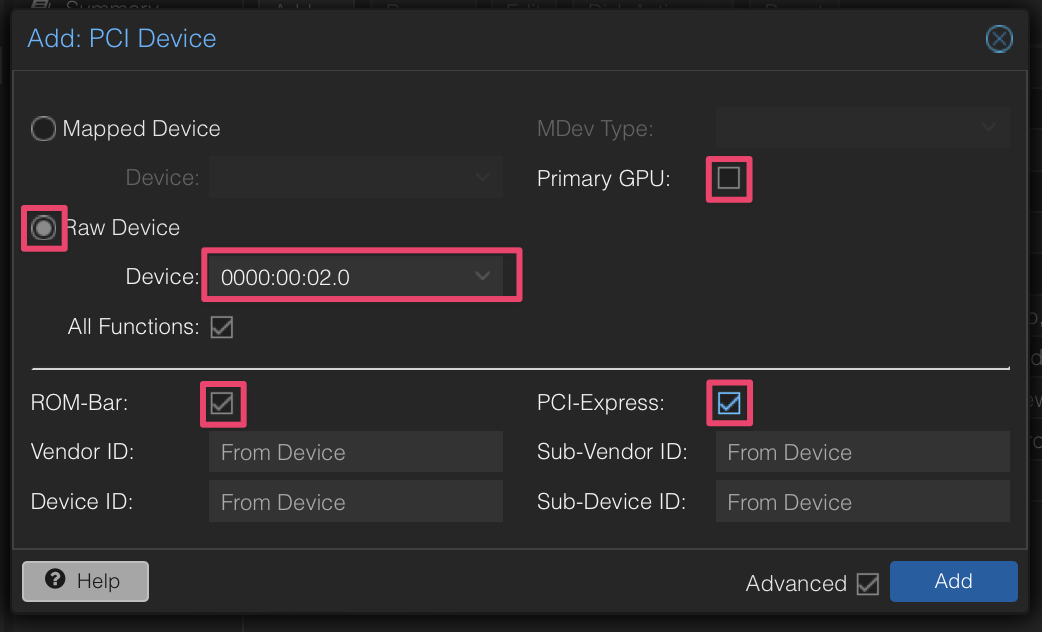
-
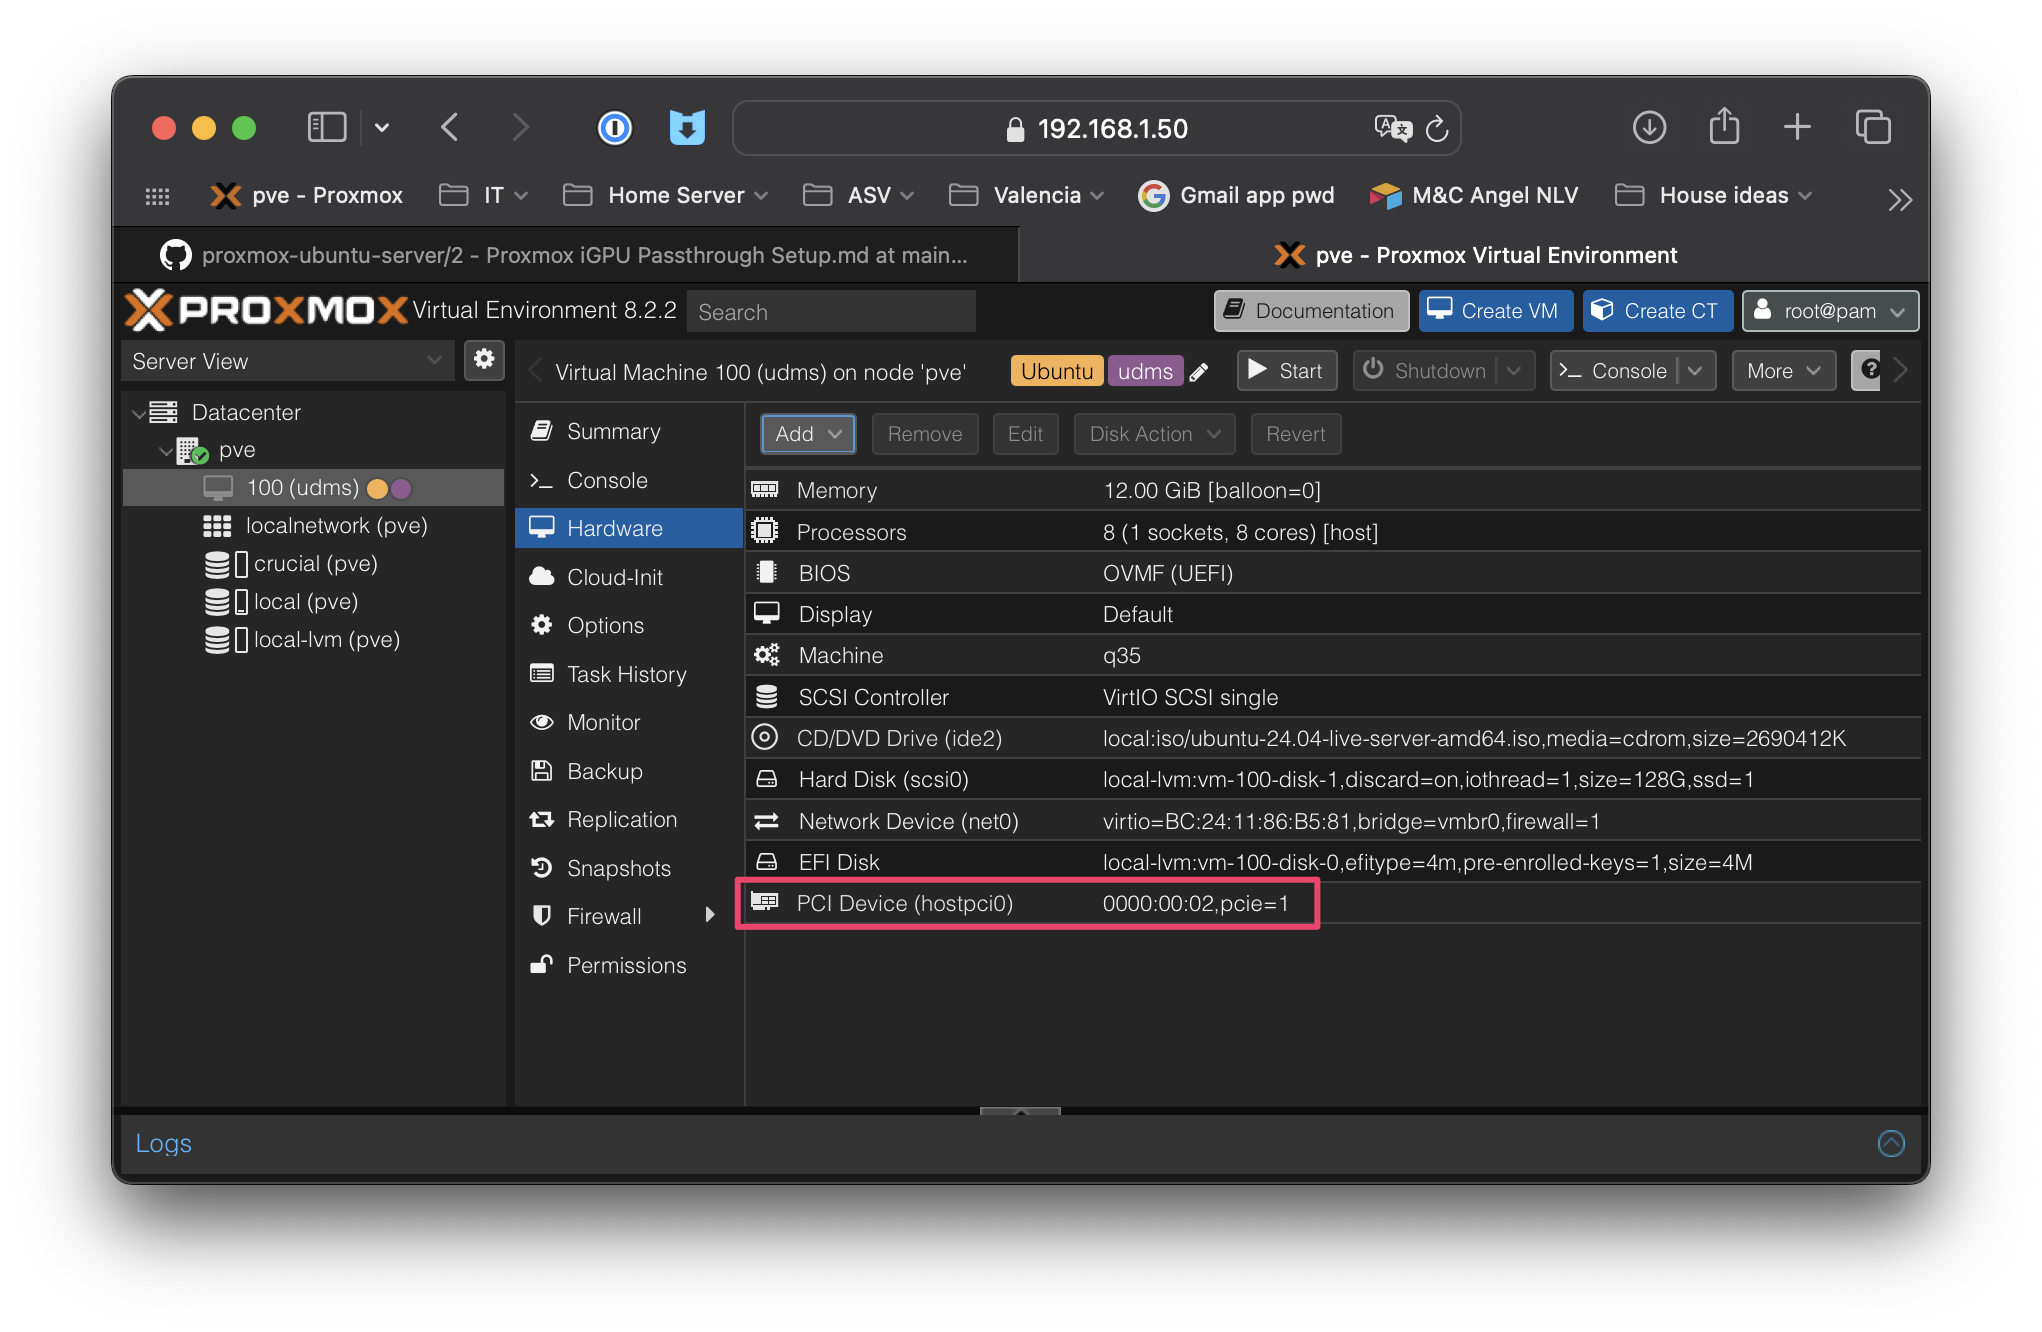
Check the results
Turn off VM Display
-
Turn off the VM “Display” so it will not use the GPU hardware that we have passed through:
pve→[VM#]→Hardware→Display→Edit→Graphic Card→noneThis will mean that the VM “>_ Console” button on the left sidebar will no longer work. However, you can still access the VM terminal by using the “>_ Console” button on the top nav bar or through SSH.
-
Reboot the VM
Verify iGPU hardware passthough is working in the Ubuntu VM
Run the following commands to confirm your GPU hardware is available for use by your Ubuntu VM.
-
Check to see if your VGA adapter is available:
lspci -k | grep VGAlspci -n -s 01:00 -vlspci -nnv | grep VGA -
Check to confirm
Kernel driver in use: i915:lspci -n -s 01:00 -v -
Check to see that you have
renderD128in/dev/drils -l /dev/dri/by-path/
That’s it. If all the above check out, your GPU is available within your Ubuntu VM to use for functions like Plex HW transcoding.